RStudio Connect (RSC) is a relatively new platform of RStudio. It is a place where you can share your Shiny applications, R Markdown reports, Plumber APIs, plots and more with your team and your users. It uses the push-button functionality from your local RStudio to deploy your artefacts to RSC. This works just like using Shinyapps.io, but that platform can only be used to share Shiny apps. In this post I will tell you how I have installed RSC on AWS.
Note: you can try RStudio Connect 45 days for free, after that you will need to buy a license.
Installation
I am working primarily with Ubuntu, so I have installed RSC on Ubuntu 18. You can also install it on other Linux distributions such as Redhat or Suse. In order to install RSC root privileges are required and (of course) R need to be installed. So, let’s start with that.
Install R
- Install the packages needed to add a new repository over HTTPS:
sudo apt install apt-transport-https software-properties-common - Enable the CRAN repository and add the CRAN GPG key to your system:
sudo apt-key adv --keyserver keyserver.ubuntu.com --recv-keys E298A3A825C0D65DFD57CBB651716619E084DAB9 sudo add-apt-repository 'deb https://cloud.r-project.org/bin/linux/ubuntu bionic-cran35/' - Now that the repository is added, update the packages list and install the R package:
sudo apt update sudo apt install r-base - To verify that R is installed successfully, run the following command, it prints the R version:
R --version
Install RSC
Now that R is installed, let’s proceed with RSC. The latest version, at the moment of this blog creation is 1.6.10, but please check the RStudio site for the latest release.
sudo apt-get install gdebi-core
wget https://s3.amazonaws.com/rstudio-connect/rstudio-connect_1.6.10-3_amd64.deb
sudo gdebi rstudio-connect_1.6.10-3_amd64.deb
Configuration
Two things need to be configured as a bare minimum. These are the Server email address and the Server hostname. The configuration can be found at /etc/rstudio-connect/rstudio-connect.gcfg. Open the file and look for the “Server” section. They are empty by default. The SenderEmail is the address that you will see, when RSC sends an email to you. The address is the public URL used to access the server. When accessible over a non-standard port (e.g. not 80), this URL must contain both hostname and port!
[Server]
SenderEmail = rstudio-connect@company.com
Address = https://rstudio-connect.company.com/
After setting these properties, restart the RSC process:
sudo systemctl restart rstudio-connect
Testing
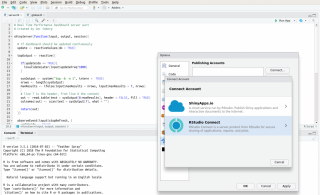
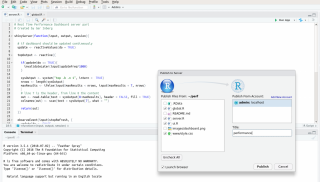
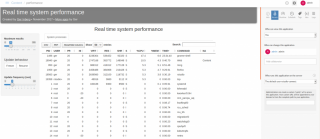
RSC should be up and running now, so it’s time to test it with an actual deployment. From RStudio, I am deploying a Shiny app through the push-button. This blue button is located on the top right side of the source window when you are editing a Shiny source file (e.g. server.R, ui.R or app.R). First, choose the option ‘Manage accounts’ to setup a connection to your RSC. It will start a popup where you have to fill in the RSC URL, so that you can give it permission to install applications. Next, choose the ‘Publish Application’ option. In the popup that opens, choose a name and select the files needed by your application. Click ‘Publish’ and your first app is going to be deployed on RSC. The first time to deploy a new application can take quite a while, since it probably needs to install some libraries.


